Welcome to iCAN/Starfish student guide!
What can you do with iCAN?
iCAN, powered by Starfish Early Alert, provides a central location to connect to the people and services that can help you achieve your accademic goals – all of them accessible from the side navigation menu of your iCAN Home page. It helps track your progress and connects you to relevant resources.
Please, log in to your iCAN/Starfish Home using the top tab of Blackboard named "iCAN" or directly to the "iCAN" link in My BSU. If it is the first time you do it, the page will ask you to fill-in some information about you, just as the image below.

Once you have a profile, the appearance of the page will be like the image below.

This guide includes the basic steps you need to use iCAN features:
- Set up your profile: Make it easier for your instructors and advisors to get to know you and stay in contact.
- Connect to people and services that can help you: Use your personalized My Success Network and Courses channels for quick access to contact information, appointment scheduling, and course help.
- Stay on track: Use your personalized Dashboard to stay on top of upcoming appointments, assignments, plans, and recommendations from your instructors.
Create/Update your profile in iCAN
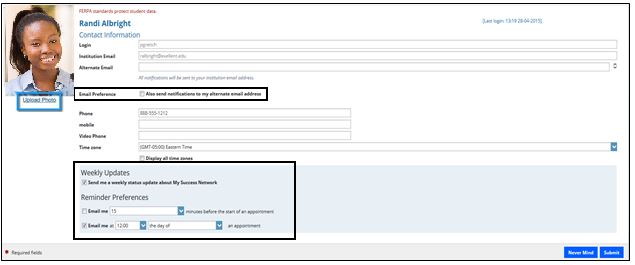
Begin by setting up your student profile. Your profile lets instructors and advisors know who you are and how to contact you. It also gives you control over how you wish to receive emails.
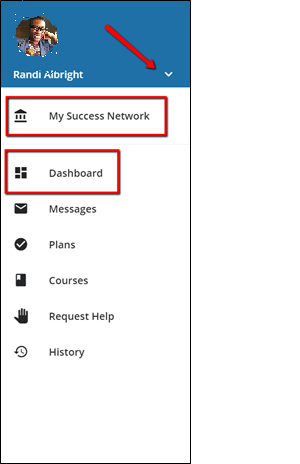
- Click the drop-down menu next to your name in the top right corner of your Home page to open your profile.
- From here, you can customize your profile by uploading a photo, setting appointment reminders, and adding a secondary email address for receiving Starfish emails (e.g. your mobile phone).
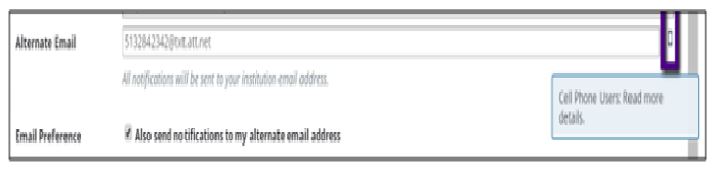
To have Starfish emails sent to your mobile phone (in addition to sending to your primary institutional email address):
- Enter the email address of your mobile phone in the Alternate Email field. This address will be a combination of your phone number plus carrier information. Click the cellphone icon for a list of common carriers and email address formats.
- Click the Both radio button associated with “Send my correspondence to”.
- Click Upload Photo (as in the image below) to upload your profile photo.
- Once you have made your desired changes to your profile, click the Submit button to save your updates.

Connect to people and services that can help you
My Success Network

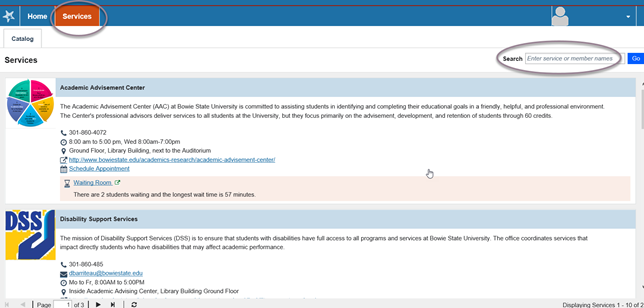
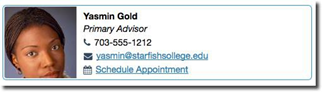
Select My Success Network from the navigation menu to duisplay personlized network. My Success Network and Courses channels display the people and services that are available to help you succeed. This channel lists the people and resources that are available to assist you. (You can browse a broader list of available services in the Service Catalog). For each person or service listed you will find contact information, supporting websites, and, if online scheduling is enabled, a link to make an appointment. If a service includes a waiting room for walk-in appointments, you can click the “Waiting Room” link to find out how many students are currently in line.
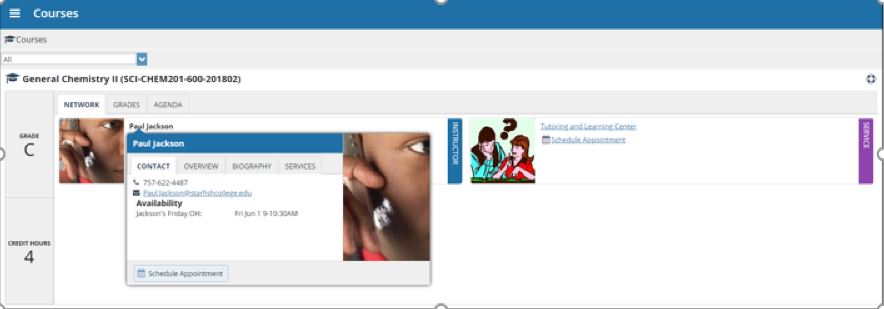
Courses
Select courses from the side navigation menu to display information about the courses you are enrolled in as well as contacts and available support related to each. Like the My Success Network channel, it is personalized to show the people and services specific to the courses you are taking, and gives you the ability to make an appointment or request help related to a course.
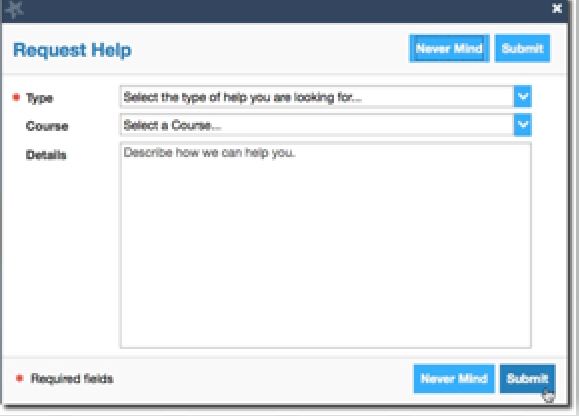
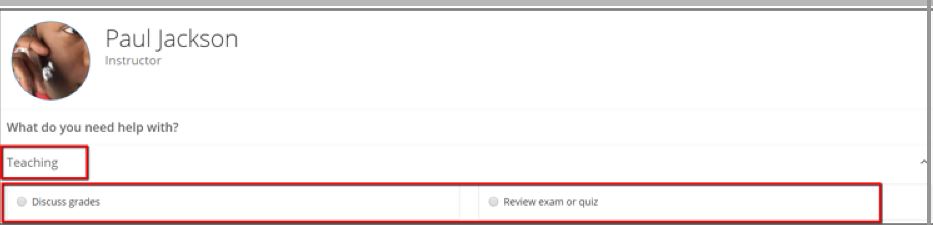
- Click the Help icon link in the upper, right corner next to any of the courses in which you are currently enrolled.
- This will help bring up Request Help form, ( see image below). Select the type of help needed from the drop down and give specific Details on how the instructor can assist you.

- Click the Submit button to submit your request when you are finished.
Make an Appointment
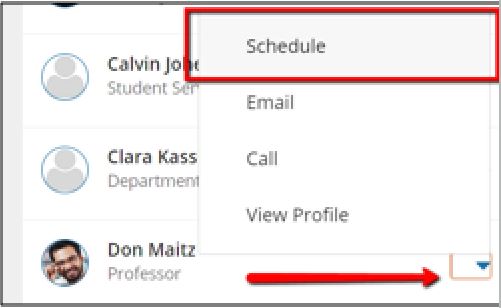
- From the My Success Network, click the triangle beside the name of the person you want to schedule appointment with, and then select Schedule. For Services where appointments are avaialble, select Schedule for the desired service.(See image below)
- Or, from the Course channel, select Schedule Appointment below the contact information for the desired person or service.
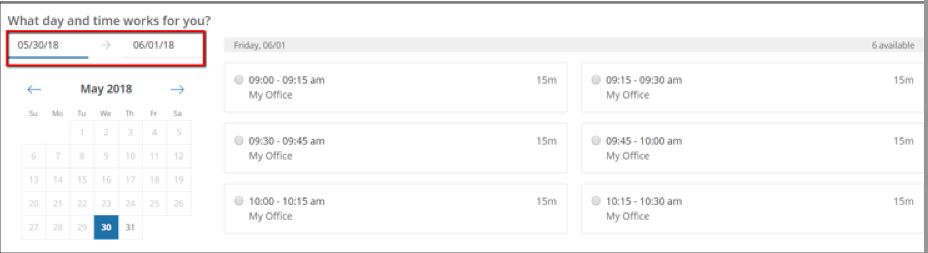
- Select the type of appointment you want to schedule and choose a reason from the list.
- Adjust the date range as needed to find days and times that work for your schedule, and then select a time from the list.
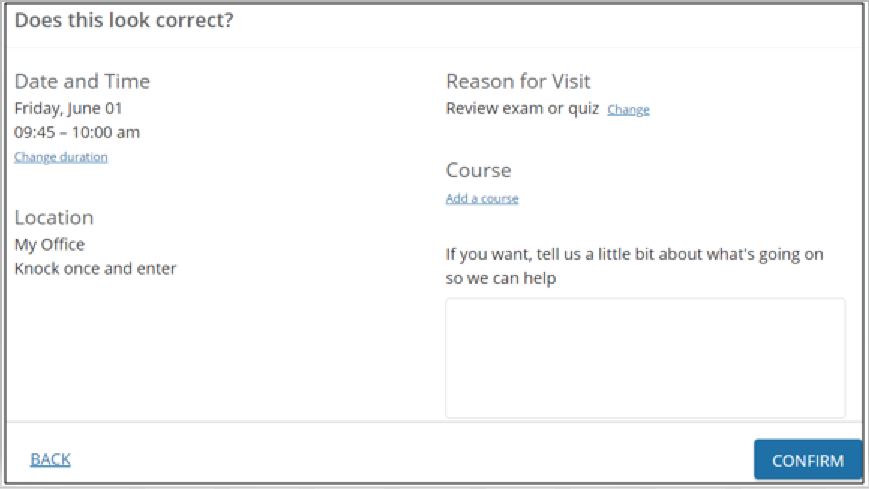
- Complete your sign up by adjusting any details, such as duration or course, where applicable, and add a description for why you want to meet.
- Click Confirm to finish scheduling the appointment. You will get an email with the appointment details and the appointment will be listed on your Dashbaord
Change an Appointment
Upcoming appointments will be listed on your Dashboard in the timeline view (left column). Click edit icon to modify the appointment or the cancel icon (x) to cancel it.

Stay on track in your course
Dashboard
Your Dashboard displays upcoming appointments and date-based tasks on the left to help you plan your week. The right-hand column of your Dashboard highlights items that require your attention and may include alerts related to your class work, recommended referrals to campus support offices to help you succeed, and Kudos from your instructors.
Plans
The Success Plans channel will display any customized success plans created for you by your advisor. These plans contain specific tasks with due dates. Click the View Details button associated with a plan to display a printable version of the plan. Select Degree Planner to create, view, and/or manage your academic degree plan.
Need Urgent Help?
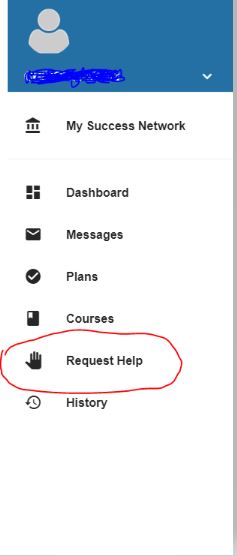
Select Request Help from the navigation menu to see information about where to go for assistance.
- From the My Success Network, click the triangle beside the name of the person you want to schedule appointment with, and then select Schedule. For Services where appointments are avaialble, select Schedule for the desired service.(See image below)